Singer 99K Sewing Machine Instruction Manual: A Comprehensive Guide
Discover a detailed resource for your Singer 99K, covering its history, operation, maintenance, and access to original & reproduction manuals online and in print.
The Singer 99K is a remarkably popular and enduring sewing machine, celebrated for its robust construction and versatile capabilities. This machine, particularly favored for domestic use, boasts a unique blend of mechanical precision and user-friendly design. Understanding its intricacies requires a dedicated guide, as evidenced by the availability of both original and reproduction instruction manuals.
Whether you’ve inherited a vintage model or recently acquired one, this comprehensive resource will unlock the full potential of your Singer 99K. We’ll navigate its features, offering insights into threading, operation, and troubleshooting, ensuring a seamless sewing experience.
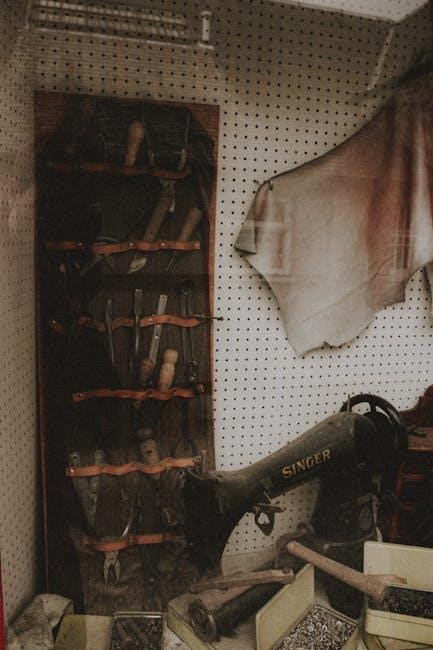
Historical Context of the Singer 99K
Introduced in 1911, the Singer 99K quickly became a cornerstone of home sewing. It represented a shift towards more accessible and reliable machines for the burgeoning domestic market. Unlike earlier models, the 99K featured a convertible feed, allowing for both straight and decorative stitching – a significant advancement.
Production spanned several decades, with variations emerging over time, notably between early and later models. These changes included adjustments to the tension and stitch length mechanisms. The 99K’s enduring popularity led to continued reproduction of its instruction manual, demonstrating its lasting relevance to sewing enthusiasts today.
Identifying Your Singer 99K Model (Early vs. Later)
Distinguishing between early and later Singer 99K models is crucial for using the correct instruction manual. Early models, produced before the mid-1920s, typically feature a numbered stitch length lever and a tension assembly with a different configuration. Later models, like the 99-31, showcase a numbered tension dial alongside the stitch length lever.
Reproduction manuals often specify which model they cover. Examining these key components – the tension dial and stitch length lever – will help you accurately identify your machine and ensure you’re referencing the appropriate guidance for operation and maintenance.
Understanding the Key Components
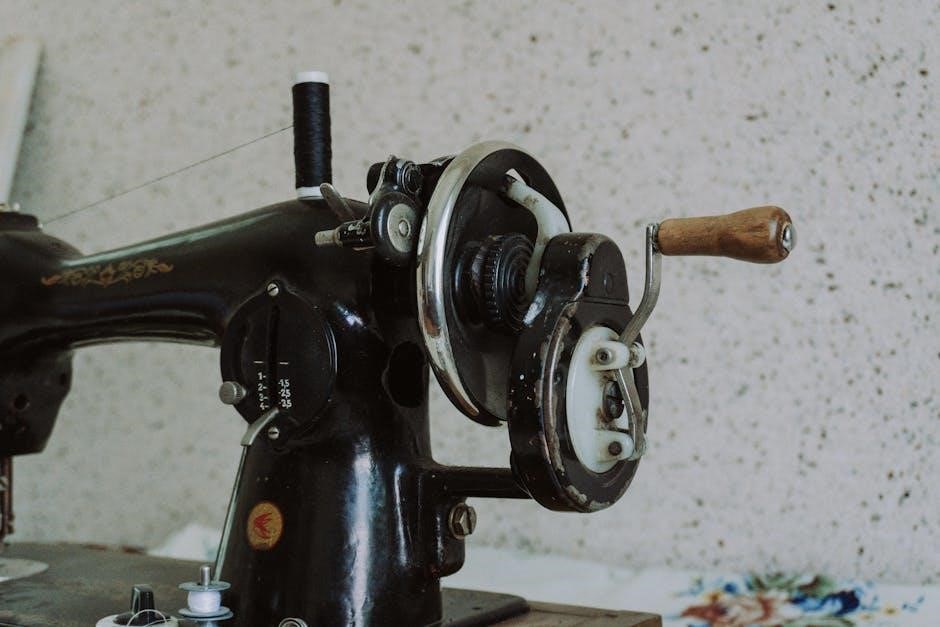
The Singer 99K’s functionality relies on several core components. The handwheel and flywheel control the sewing speed, while the tension assembly regulates thread tightness for balanced stitches. Mastering the stitch length lever allows for adjustments to stitch density, impacting fabric appearance and strength;

Furthermore, the reverse mechanism enables secure backstitching for reinforcing seams. Familiarizing yourself with each component’s purpose and operation, as detailed in the instruction manual, is essential for efficient sewing and troubleshooting potential issues with your vintage machine.
The Handwheel and Flywheel
The handwheel, located on the right side of the Singer 99K, is your primary control for sewing speed. Turning it clockwise advances the needle and drives the machine. The flywheel, integrated with the handwheel, provides momentum, ensuring smooth and consistent stitching.
A complete rotation of the handwheel typically corresponds to one stitch. Gentle, controlled turns yield precise results, while faster rotations increase sewing speed. Always use the handwheel to carefully raise and lower the needle, especially when starting or stopping a seam, for optimal control.
The Tension Assembly
The Singer 99K’s tension assembly is crucial for balanced stitch formation. It controls the amount of upper thread tension, ensuring the thread interlocks correctly with the bobbin thread. Later models feature numbered tension settings for precise adjustments.
Incorrect tension leads to looping or puckering. Higher numbers increase tension, ideal for thicker fabrics, while lower numbers are suited for delicate materials. Regularly check and adjust the tension based on your fabric and thread combination for consistently beautiful stitches; Proper tension is key to sewing success!
The Stitch Length Lever
The stitch length lever on the Singer 99K dictates the length of each stitch, influencing the fabric’s appearance and strength. Later models utilize a numbered lever, offering more precise control over stitch length. Lower numbers create shorter stitches, suitable for delicate fabrics and basting, while higher numbers produce longer stitches for quicker sewing and heavier materials.
Experiment with different stitch lengths to achieve the desired aesthetic and functionality. Consistent stitch length is vital for professional-looking seams. Adjusting this lever is fundamental to mastering your Singer 99K.
The Reverse Mechanism
The Singer 99K’s reverse mechanism allows for backstitching, securing seams at the beginning and end to prevent unraveling. Engaging this mechanism typically involves lifting a lever or pressing a button, causing the machine to sew in reverse. It’s crucial to use reverse sparingly – a few stitches are usually sufficient.
Prolonged reverse sewing can damage the machine’s internal components. Always return to forward stitching before continuing your project. Mastering the reverse function ensures durable and professionally finished seams on your vintage Singer 99K.
Threading the Singer 99K
Proper threading is essential for the Singer 99K’s operation. This process involves three key stages: upper threading, bobbin winding and insertion, and lower threading. Begin by raising the presser foot and threading the machine from the spool, through the tension assembly, and finally to the needle.
Next, wind the bobbin evenly and insert it correctly into the bobbin case. Finally, guide the thread through the lower tension mechanism. Correct threading prevents skipped stitches and ensures smooth, consistent sewing.
Upper Threading Procedure
To begin upper threading, place the spool of thread on the spool pin. Then, draw the thread through the upper tension assembly, ensuring it seats firmly between the tension discs. Next, guide the thread down and around the take-up lever, and then through the wire guide.
Finally, thread the needle from front to back. Always raise the presser foot during threading to release tension. A correctly threaded machine is crucial for consistent stitch formation and preventing thread breakage during operation.
Bobbin Winding and Insertion
Begin bobbin winding by placing the spool on the pin and guiding the thread to the bobbin winder tension disc. Engage the bobbin winder by sliding it to the right. Wind several layers of thread evenly onto the bobbin, then disengage the winder.
To insert, hold the bobbin with the thread unwinding counter-clockwise and place it into the bobbin case. Guide the thread through the tension spring and out through the slot, ensuring a smooth, even pull. Proper bobbin winding and insertion are vital for balanced stitch quality.
Lower Threading Procedure
Start by ensuring the presser foot is raised, allowing for smooth thread passage. Guide the lower thread down through the needle plate holes, then into the bobbin area. Carefully thread the thread through the tension spring of the bobbin case, ensuring it’s securely seated.
Pull the thread out through the slot and gently draw it up to the surface. A properly threaded lower section is crucial for forming a balanced stitch alongside the upper thread, preventing looping or tension issues.
Basic Sewing Operations
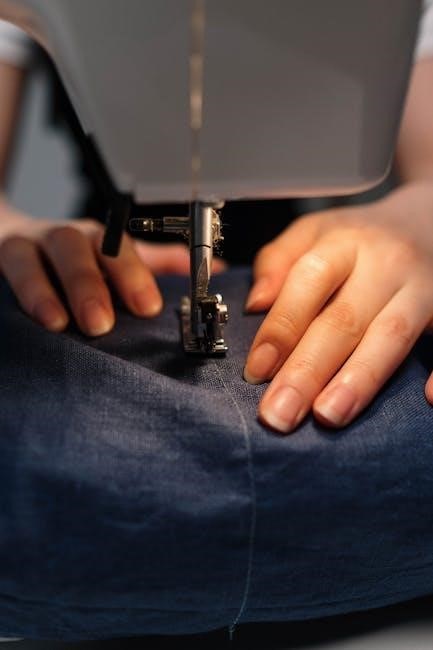
Mastering the Singer 99K begins with understanding fundamental techniques. Straight stitching requires consistent fabric feeding and even pressure on the foot pedal. Utilize the stitch length lever to adjust the stitch size according to your fabric weight and desired aesthetic.
Reverse stitching, activated by a dedicated mechanism, is essential for securing seams. Practice these core operations to build confidence and achieve professional-quality results. Remember to always test stitch on scrap fabric before beginning your project.
Straight Stitching Techniques
Achieving a perfect straight stitch on your Singer 99K requires a steady hand and proper setup. Ensure the fabric is aligned with the guide markings on the needle plate. Maintain a consistent sewing speed, avoiding abrupt starts or stops. Gentle pressure on the foot pedal is key to even fabric feed.
Regularly check the stitch length setting, adjusting it based on the fabric type. Practice guiding the fabric smoothly, without pulling or pushing, for a clean, professional finish. Consistent practice builds muscle memory and precision.
Reverse Stitching Explained
The Singer 99K’s reverse mechanism, activated by a lever, allows for backstitching to secure seams. Engage the lever before reaching the seam’s end, and gently lower the needle into the fabric. Slowly reverse stitch a short distance – typically ¼ to ½ inch – before lifting the lever to return to forward stitching.
Avoid prolonged reverse stitching, as it can strain the machine. Release the reverse lever smoothly to prevent thread bunching. Practice on scrap fabric to master the transition between forward and reverse, ensuring neat, secure seam endings.
Adjusting Stitch Length
The Singer 99K’s stitch length is controlled by a numbered lever, offering precise adjustments for various fabrics and techniques. Lower numbers create shorter stitches, ideal for delicate materials or basting, while higher numbers produce longer stitches suitable for heavier fabrics or gathering.
Experiment with different settings on scrap fabric to determine the optimal stitch length for your project; A stitch length of 2.5mm is generally suitable for standard sewing. Always test before sewing your final garment to ensure a professional finish;
Troubleshooting Common Issues

Encountering problems with your Singer 99K is common, but often easily resolved. Thread breakage can stem from improper threading, a dull needle, or incorrect tension. Skipped stitches frequently indicate a bent needle, incorrect needle size for the fabric, or timing issues.
Tension adjustments are crucial; too tight causes puckering, while too loose leads to looping. Refer to the tension guide and experiment with small adjustments. Regularly cleaning and oiling your machine prevents many issues, ensuring smooth operation and longevity.
Thread Breakage Problems
Frequent thread breakage on your Singer 99K often points to a few key culprits. First, meticulously re-thread the machine, ensuring the thread is properly seated in all guides and the tension discs. A dull or damaged needle is another common cause – replace it with a new, appropriate size for your fabric.
Incorrect tension settings can also lead to breakage; experiment with slight adjustments. Finally, ensure you’re using quality thread and that the bobbin is wound evenly. Consistent issues may indicate a need for professional servicing.
Skipped Stitch Solutions
Encountering skipped stitches with your Singer 99K? Begin by verifying the needle is correctly inserted – it should be fully seated and facing the right direction. A bent or dull needle is a prime suspect; replace it immediately. Confirm you’re using the correct needle type and size for your fabric weight.
Check the timing of the machine; if significantly off, professional adjustment is needed. Ensure the presser foot pressure is adequate, and the thread isn’t tangled around the bobbin case. Finally, re-thread both upper and lower threads meticulously.
Tension Adjustment Guide
Proper tension is crucial for balanced stitches on your Singer 99K. Begin by understanding the numbered tension dial – higher numbers increase tension, lower numbers decrease it. Test stitch on a scrap of your fabric. If the upper thread pulls the bobbin thread to the underside, reduce upper tension. Conversely, if the bobbin thread appears on top, increase upper tension.
Small adjustments are key! Re-thread both threads if issues persist. Ensure the bobbin is wound evenly. A balanced tension creates a neat stitch with interlocking threads in the fabric’s middle.
Maintenance and Care
Regular maintenance ensures your Singer 99K’s longevity. Frequent cleaning removes lint and debris, preventing jams. Use a soft brush to clear the bobbin area and feed dogs. Oiling is vital; apply a few drops of sewing machine oil to all moving parts – handwheel, bobbin winder, and internal mechanisms – after cleaning.
Periodically check and replace the belt if it becomes worn or stretched. Proper care preserves the machine’s smooth operation and prevents costly repairs, keeping your Singer 99K sewing beautifully for years.
Oiling and Lubrication
Proper lubrication is crucial for a smoothly functioning Singer 99K. Apply sewing machine oil sparingly to all moving parts after each cleaning. Focus on the handwheel, bobbin winder, shuttle hook, and any internal mechanisms accessible. Avoid over-oiling, as excess oil attracts lint.
Use a low-viscosity oil specifically designed for sewing machines. Regularly oiled components reduce friction, preventing wear and tear, and ensuring consistent stitch quality. This simple step significantly extends the life of your vintage Singer.
Cleaning the Singer 99K
Regular cleaning prevents lint and dust buildup, ensuring optimal performance. Disconnect the power (if applicable) before cleaning. Use a soft brush to remove lint from the bobbin area, feed dogs, and surrounding components. A small vacuum cleaner with a brush attachment can also be helpful.
Wipe down the exterior with a damp cloth. Avoid harsh chemicals or abrasive cleaners, as they can damage the finish. Thorough cleaning maintains stitch quality and prevents mechanical issues, preserving your Singer 99K’s longevity.
Belt Replacement Instructions
To replace the belt, first disconnect the machine from power. Access the handwheel area, typically by removing a cover plate. Carefully remove the old, worn belt. Ensure the new belt is the correct size for your Singer 99K model – consult a manual if unsure.
Loop the new belt around the motor pulley and the handwheel, ensuring a snug fit. Reattach the cover plate. A properly installed belt ensures smooth, efficient operation of your sewing machine, restoring its power and functionality.
Accessing the Instruction Manual
Finding a Singer 99K manual is achievable through several avenues. The Internet Archive offers free PDF downloads of original manuals, providing a valuable resource for vintage machine owners. Reproduction manuals are readily available for purchase on platforms like Amazon and The Old Singer Shop, offering a physical copy.
Additionally, Singer’s official website hosts a collection of online manuals. These resources ensure you have access to detailed instructions for operating and maintaining your classic Singer 99K sewing machine, aiding in its longevity.

Free Download Options (Internet Archive)
The Internet Archive provides a fantastic, cost-free resource for Singer 99K owners. Users can download a complete PDF version of the original Singer 99K sewing machine manual. Multiple download formats are available, including SINGLE PAGE PROCESSED JP2 ZIP and TORRENT downloads, offering flexibility based on user preference and internet speed.
Currently, 18 files are available, including 7 original versions, ensuring access to a wealth of information. This digital archive is a superb starting point for anyone seeking guidance on their vintage Singer.
Reproduction Manual Availability (Amazon, The Old Singer Shop)
For those preferring a physical copy, reproduction instruction manuals for the Singer 99K/99-31 are readily available. Amazon.com lists a “Singer 99K Sewing Machine User Manual (Reproduction) Model 99” as part of a “Vintage-Inspired Super Bundle”.
Additionally, The Old Singer Shop specializes in vintage sewing machine resources and offers a new reproduction manual specifically for the later model 99, featuring numbered tension and stitch length levers, circa 1957. These options provide tangible guides for machine operation.
Singer’s Online Manual Resources
Singer itself provides a valuable resource for owners seeking manuals. As noted on Reddit’s r/vintagesewing forum, Singer maintains an online archive of its manuals directly on their website. This offers convenient access to original documentation for various models, including potentially the 99K.
Furthermore, The Manual Library hosts additional Singer collections, uploaded by users like chris85 in 2020. Exploring Singer’s official website and these community-driven archives can yield the necessary instructions for operating and maintaining your machine.